I’ve been editing a few artist résumés lately and notice a recurring problem:
Difficulty lining up the dates in the left and content on the right.
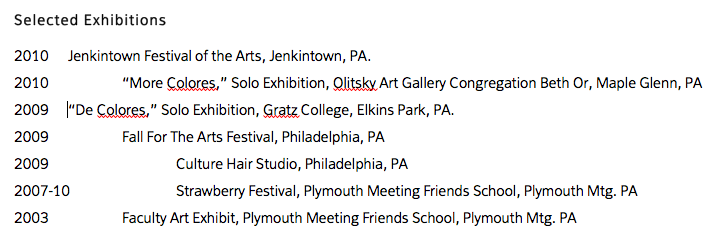
If you’re using Microsoft Word to create your résumé and are finding your columns out of line, I suggest using the Tables feature.
Unfortunately, it rarely works out to “convert” your existing text to a table. Instead, it’s better to start a table from scratch.
1. Create a table by going to Table/Insert Table. Select the number of rows and columns you need. Opt for more rows because it’s easier to delete rows than add them. And you should just need 2 columns.
Word will create a column where you can copy and paste your existing data. It will look kind of like this by default.
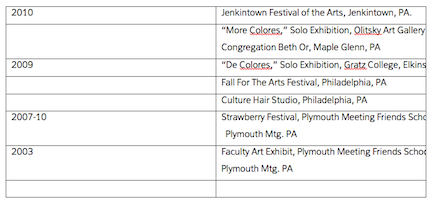
2. To tweak your table, put your cursor over the line in the center of the table and drag left. That will get your columns where you want them. You can also tweak your row height by putting your cursor on a row line and dragging it up or down. But you still have those darned borders, which you don’t want to show up on a resume.
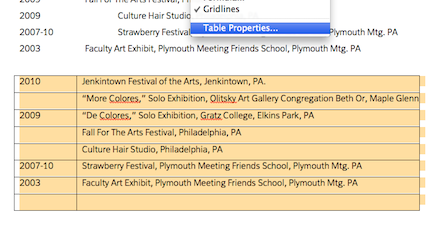
To get rid of these, highlight your table and go to Table/Table Properties.
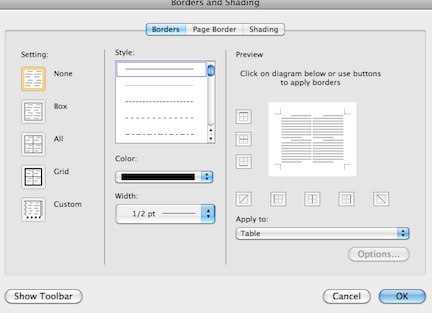
The screen will open to the default Borders page. Just select None and then OK and your borders will disappear. Note: The borders look gray on your screen, but that’s just so you can see the boundaries. They will be invisible when printed or saved as a PDF file.
Voila! Beautifully lined-up columns.
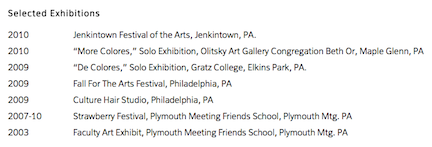
Thanks to Dora Ficher for the use of her résumé.
Use Tables to Line Up Your Résumé
- Alyson Stanfield
Share this post


3 thoughts on “Use Tables to Line Up Your Résumé”
Nice work! It does look incredibly neat 🙂
Interesting format. I was planning on writing my CV for art the same way as I have my CV for Astrophysics. I probably still will with some modifications (as in I don’t recall the dates of early things and it’s haphazard at best).
Patricia
Alyson,
I use MS Word tables a lot for many things; I hadn’t thought of this use of a table. Interesting idea!
One comment: you mentioned that it is easier to delete than to add rows. I disagree. Especially with just two columns, extra rows can be added very easily by using the tab button. You can add just one row by clicking the tab button once after placing the cursor in the last row/column. Or simply hold down that button. The tab position will proceed to jump to the next box again and again, and many rows will automatically appear! When finished and you have too many, use the cursor in the left margin (it will turn into a white outlined arrow) to select the rows you want deleted, then us that backspace key.
I know MS Word is a “word processing doc” mainly targeted for letters/words as opposed to images, but I love what one can do with it! Simply by playing around and using imagination along with acquired knowledge, I have learned how to create many types of marketing and other materials. I’ve been wondering if there is enough of a need out there in artists’ world for basic help like that. I could share what I have already learned. Any ideas of how that could be determined?